How to deploy language models with Red Hat OpenShift AI
10 September 2025
Here’s the modified text with hastags added to the beginning of each section:
Red Hat OpenShift AI provides a comprehensive platform for managing the entire data science lifecycle, from data collection to model deployment. In this guide, we will walk through the console and go through an example of deploying a Llama language model using OpenShift AI’s easy-to-navigate interface and powerful infrastructure capabilities including GPU acceleration, automatic resource scaling, and distributed computing support.
Watch a full video demo here:
Getting started with the OpenShift AI console
The OpenShift AI console is your central hub for
Red Hat OpenShift AI provides a comprehensive platform for managing the entire data science lifecycle, from data collection to model deployment. In this guide, we will walk through the console and go through an example of deploying a Llama language model using OpenShift AI’s easy-to-navigate interface and powerful infrastructure capabilities including GPU acceleration, automatic resource scaling, and distributed computing support.
Watch a full video demo here:
Getting started with the OpenShift AI console
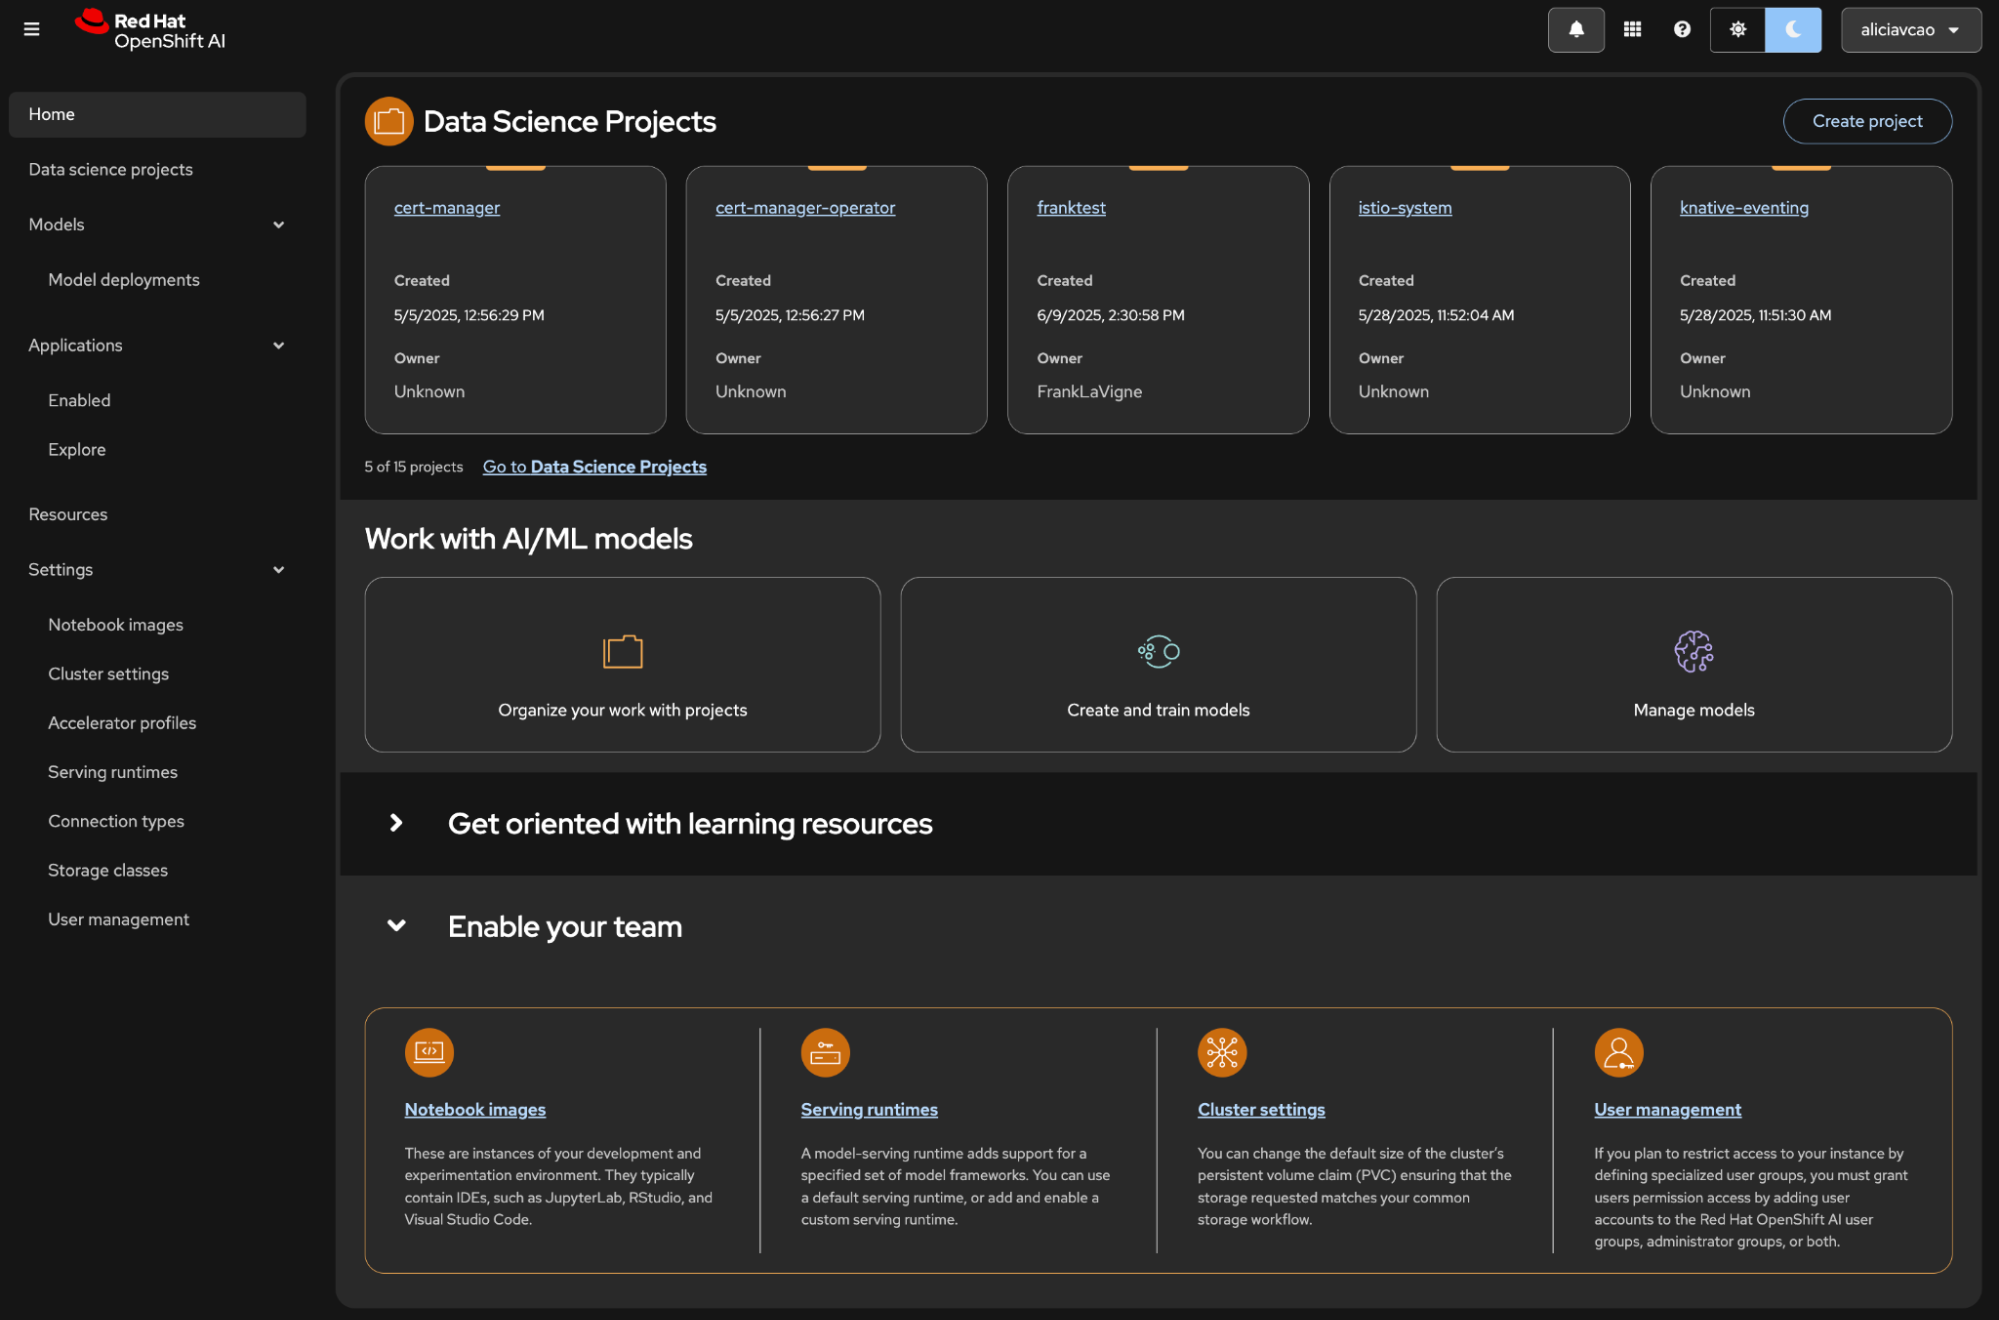
The OpenShift AI console is your central hub for managing data science projects. The side tabs on the homepage, shown in Figure 1, give you access to:
Data science projects: All your current projects/namespaces within the cluster.
Models: All of your current model deployments within the cluster.
Applications: Integrated tools for data science.
Resources: Documentation and learning tutorials to get you started.
Settings: Direct access to configuration options.
Figure 1: The OpenShift AI console.
Looking within your project dashboard
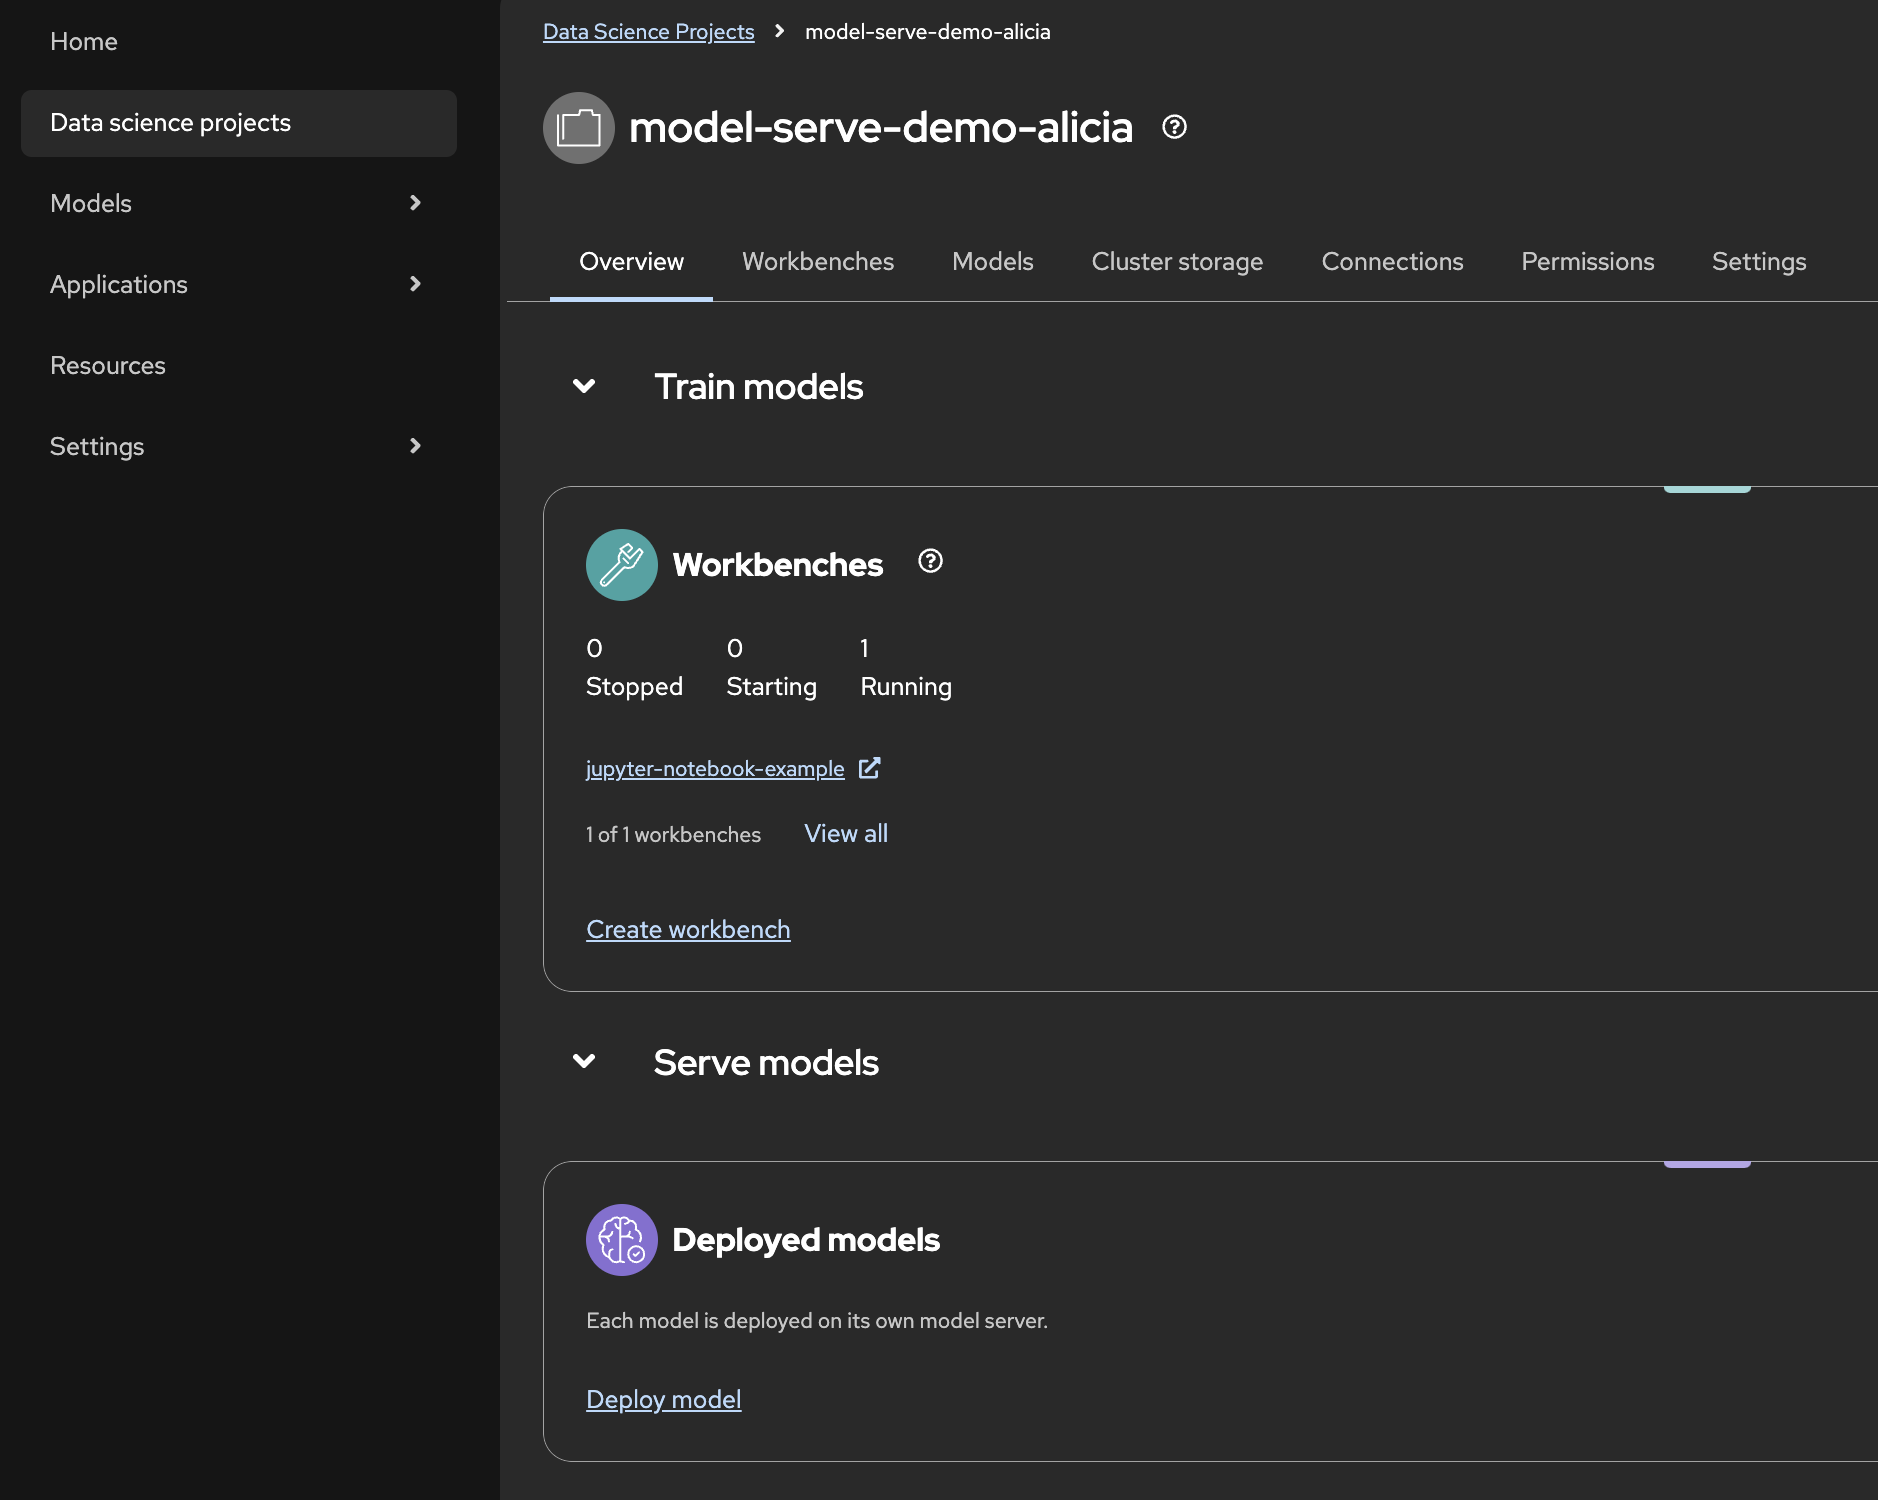
From the OpenShift AI console, navigate to Data science projects on the side tab to access a list of all of your projects within your cluster. Once you click on a project, you transition from the cluster-wide view to a project-specific dashboard that provides a focused view of resources within a single namespace. This project scoped view is shown in Figure 2.
Figure 2: The OpenShift AI project dashboard.
This project-scoped console allows you to manage:
Active workbenches: Contained environments for working with models, pipelines, and storage.
Model deployments: Status tracking for successful and failed deployments.
Storage connections: Integration with persistent storage including OpenShift Data Foundation (ODF) for block, file, and object storage, as well as cloud storage like Amazon Web Services (AWS) S3 buckets.
External connections: For example, connections to images on different registries as well as credentials for a database.
Deploying a Llama model: step-by-step
Let’s dive into the deployment process, starting with the essential GPU setup.
To start deploying with vLLM, make sure that you have GPU resources available and running. There are several ways you can deploy GPUs on your OpenShift cluster, each with different advantages depending on your infrastructure and requirements.
One commonly used approach is the NVIDIA GPU Operator, which provides automated driver management and simplified GPU resource discovery across your cluster. However, in this example we will use MachineSets to provision GPU-enabled nodes, which gives us direct control over the underlying compute instances and allows us to integrate GPU provisioning seamlessly with OpenShift’s native cluster scaling and node lifecycle management capabilities.
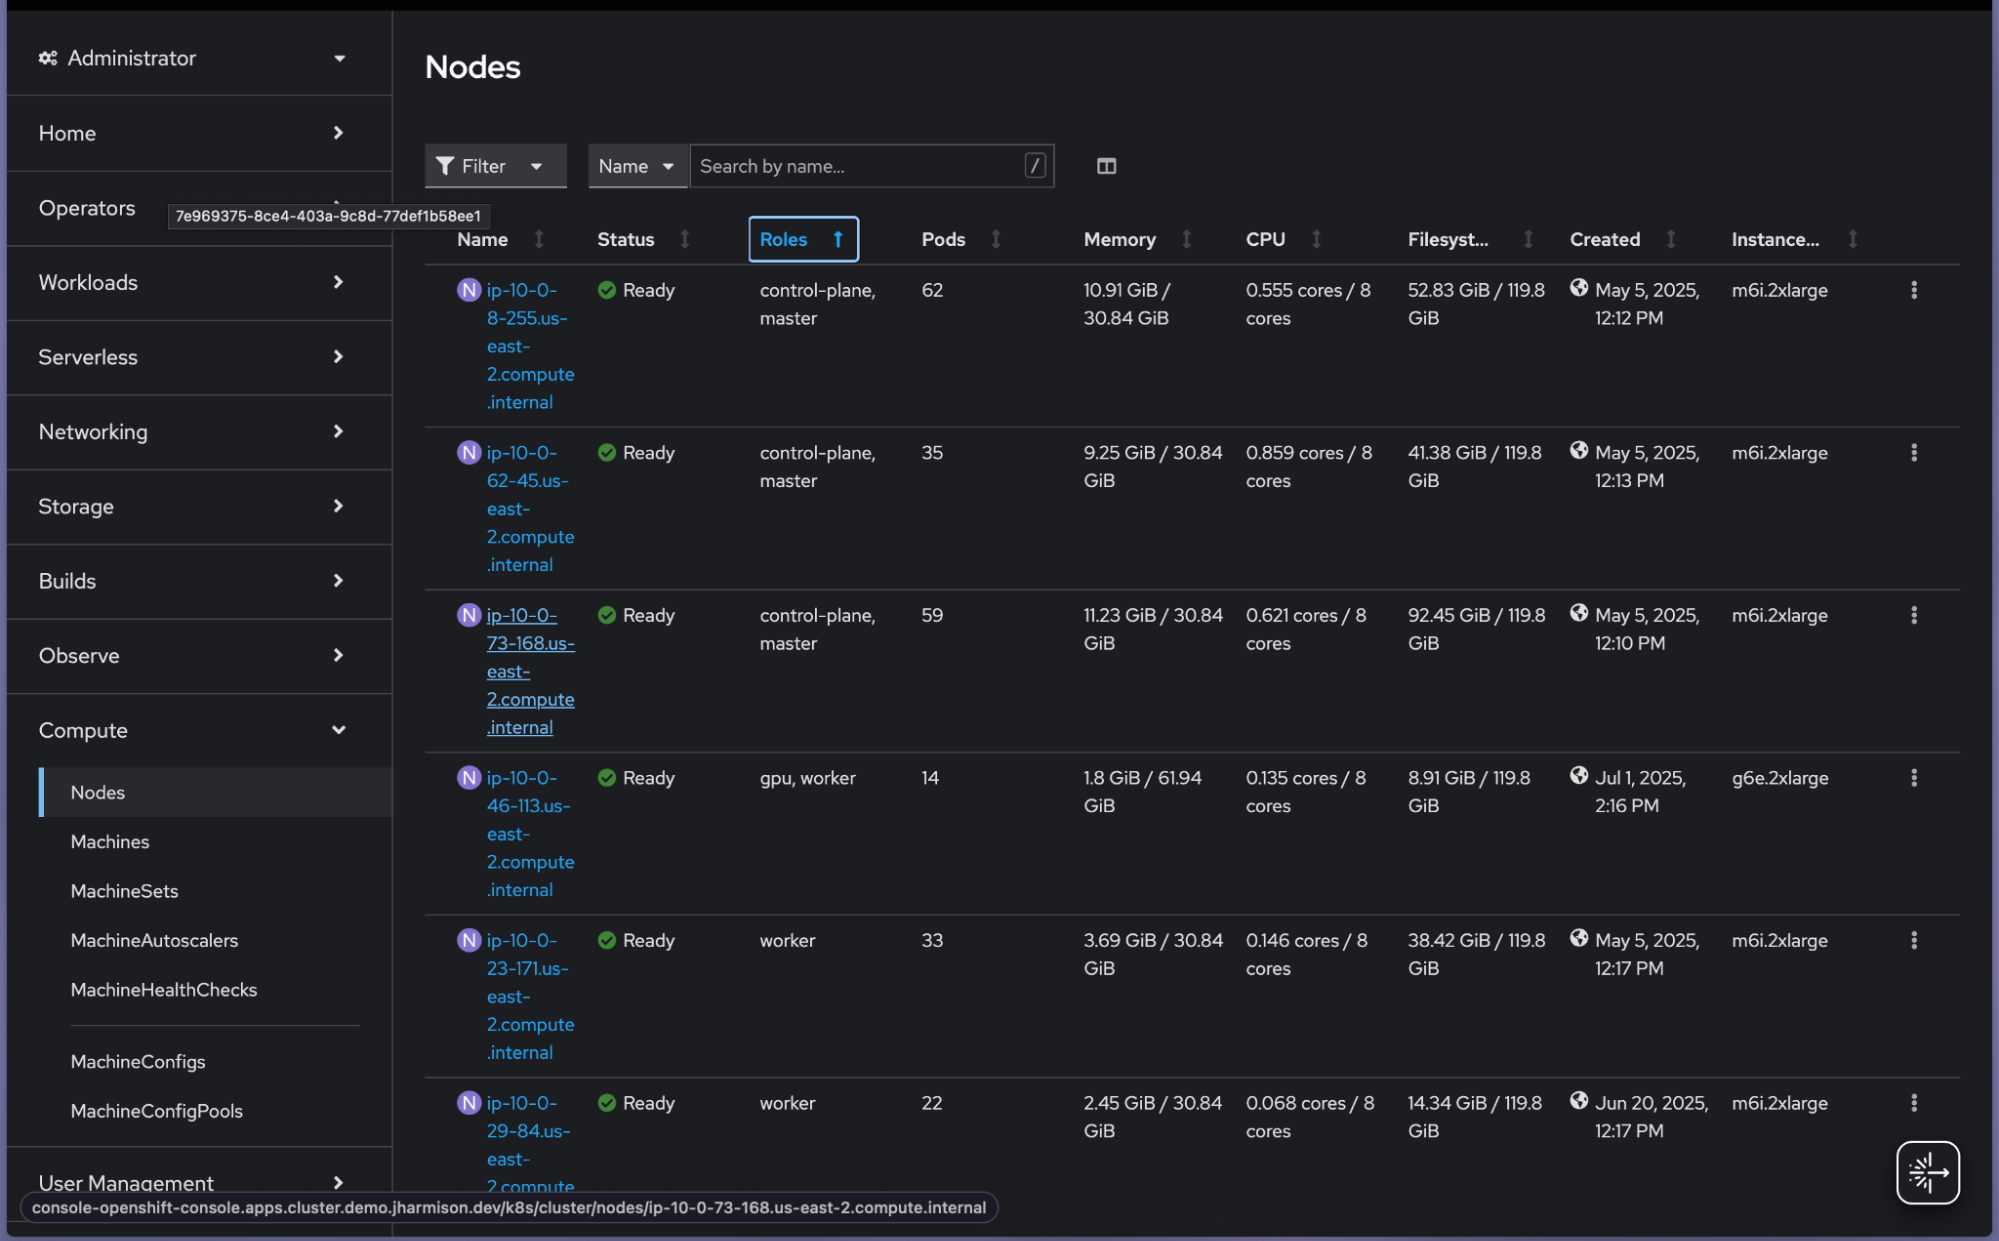
Access the OpenShift console: Navigate to Compute → MachineSets.
Provision GPU node: Adjust the desired count for your GPU MachineSet.
Wait for readiness: Allow approximately 20 minutes for the complete setup.
Verify status: Check the Nodes tab and filter for GPU workers by clicking Roles. In green you can see the specific node seems to be ready (Figure 3).
Figure 3: The Nodes tab in the OpenShift AI console.
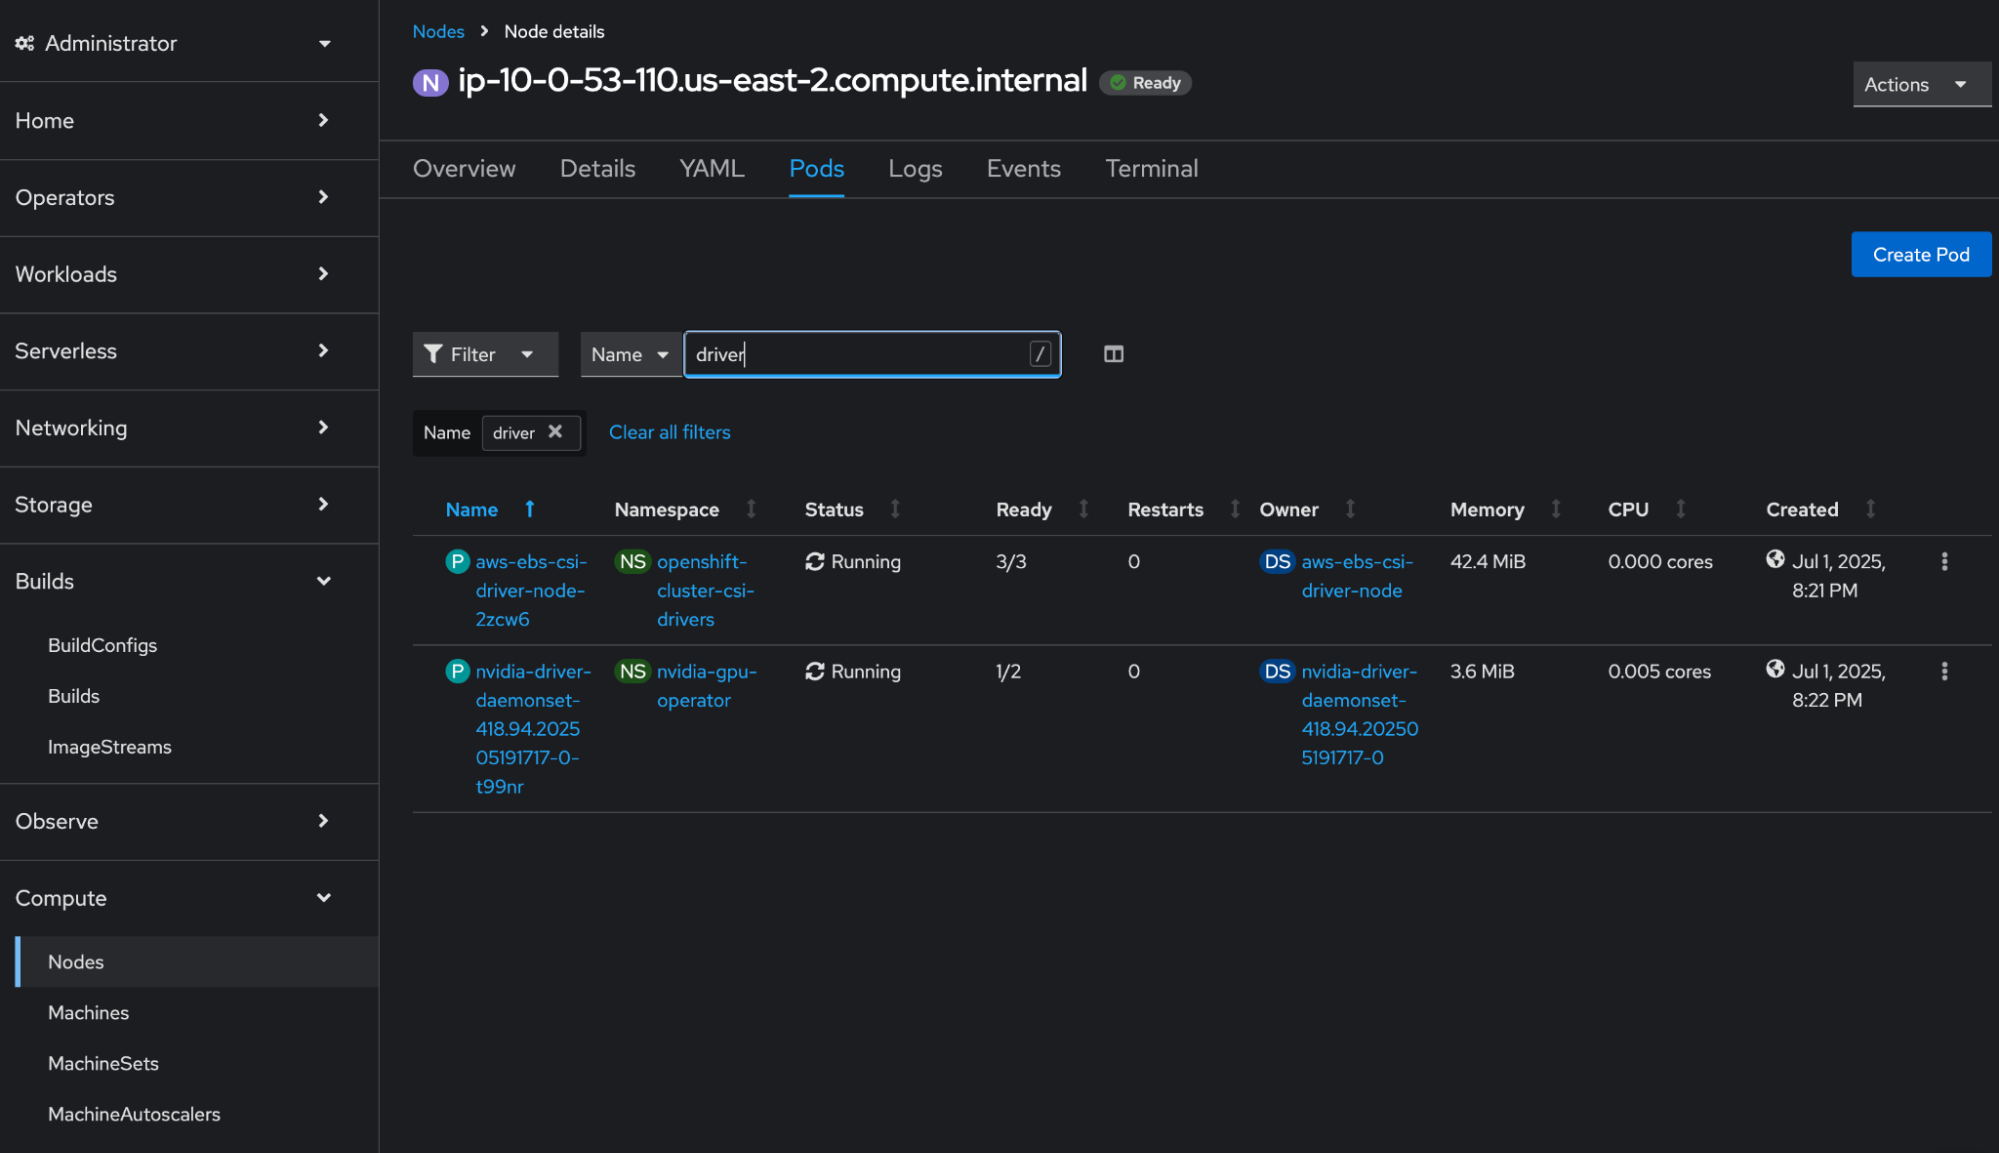
Confirm drivers: Click into the node name and select Pods on the top tab. You will see the screen in Figure 4. Search for driver in the pods to ensure the driver daemon set shows Ready and Running.
Figure 4: Viewing the Pods tab for a particular node.
Establishing model connections
Now that we have confirmed our GPU instance is ready and running, we can now create our connection to a ModelCar container image. A ModelCar image is an OCI-compliant container that packages a machine learning model with its runtime environment and dependencies for consistent deployment across different platforms.
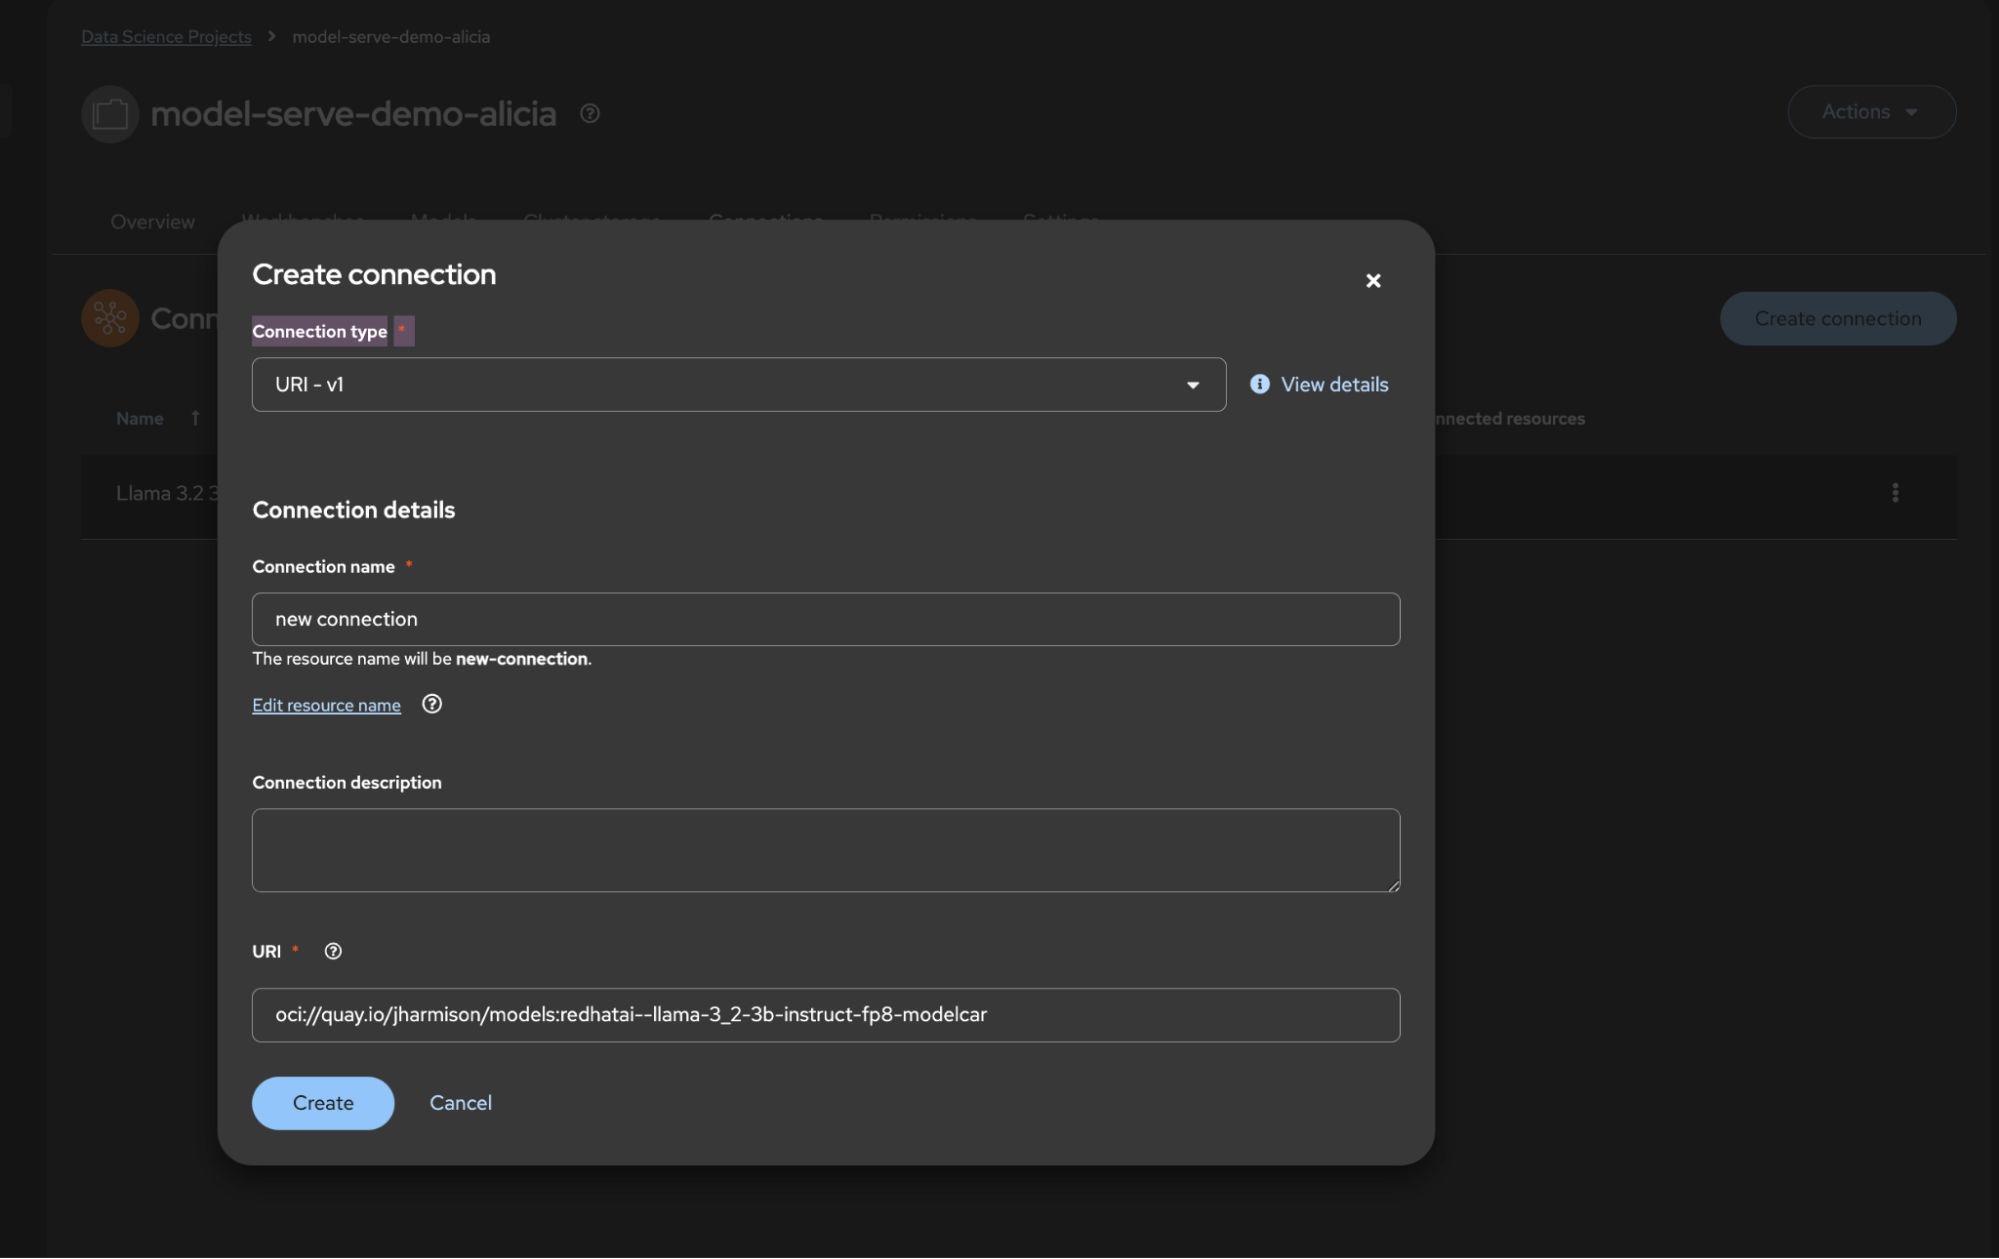
Going back to your project view in OpenShift AI, select connections on the top tabs and create a new connection by pressing the button outlined in red in Figure 5. Once pressed, select the URI connection type you want. OpenShift AI supports three connection types for accessing model images:
OCI-compliant registry: For proprietary images requiring authentication.
S3 compatible object storage: For cloud storage solutions.
URI: For publicly available resources (we will use this for our demo).
Figure 5: Creating an external connection using a URI connection type.
For our Llama model demonstration, we’re using a publicly available container image from the Quay.io image registry. We will be using the Llama 3.2 language model with 3 billion parameters, fine-tuned for following instructions, using 8-bit floating-point precision for reduced memory usage. To create this connection to your project, just input this for the URI, as shown in Figure 5.
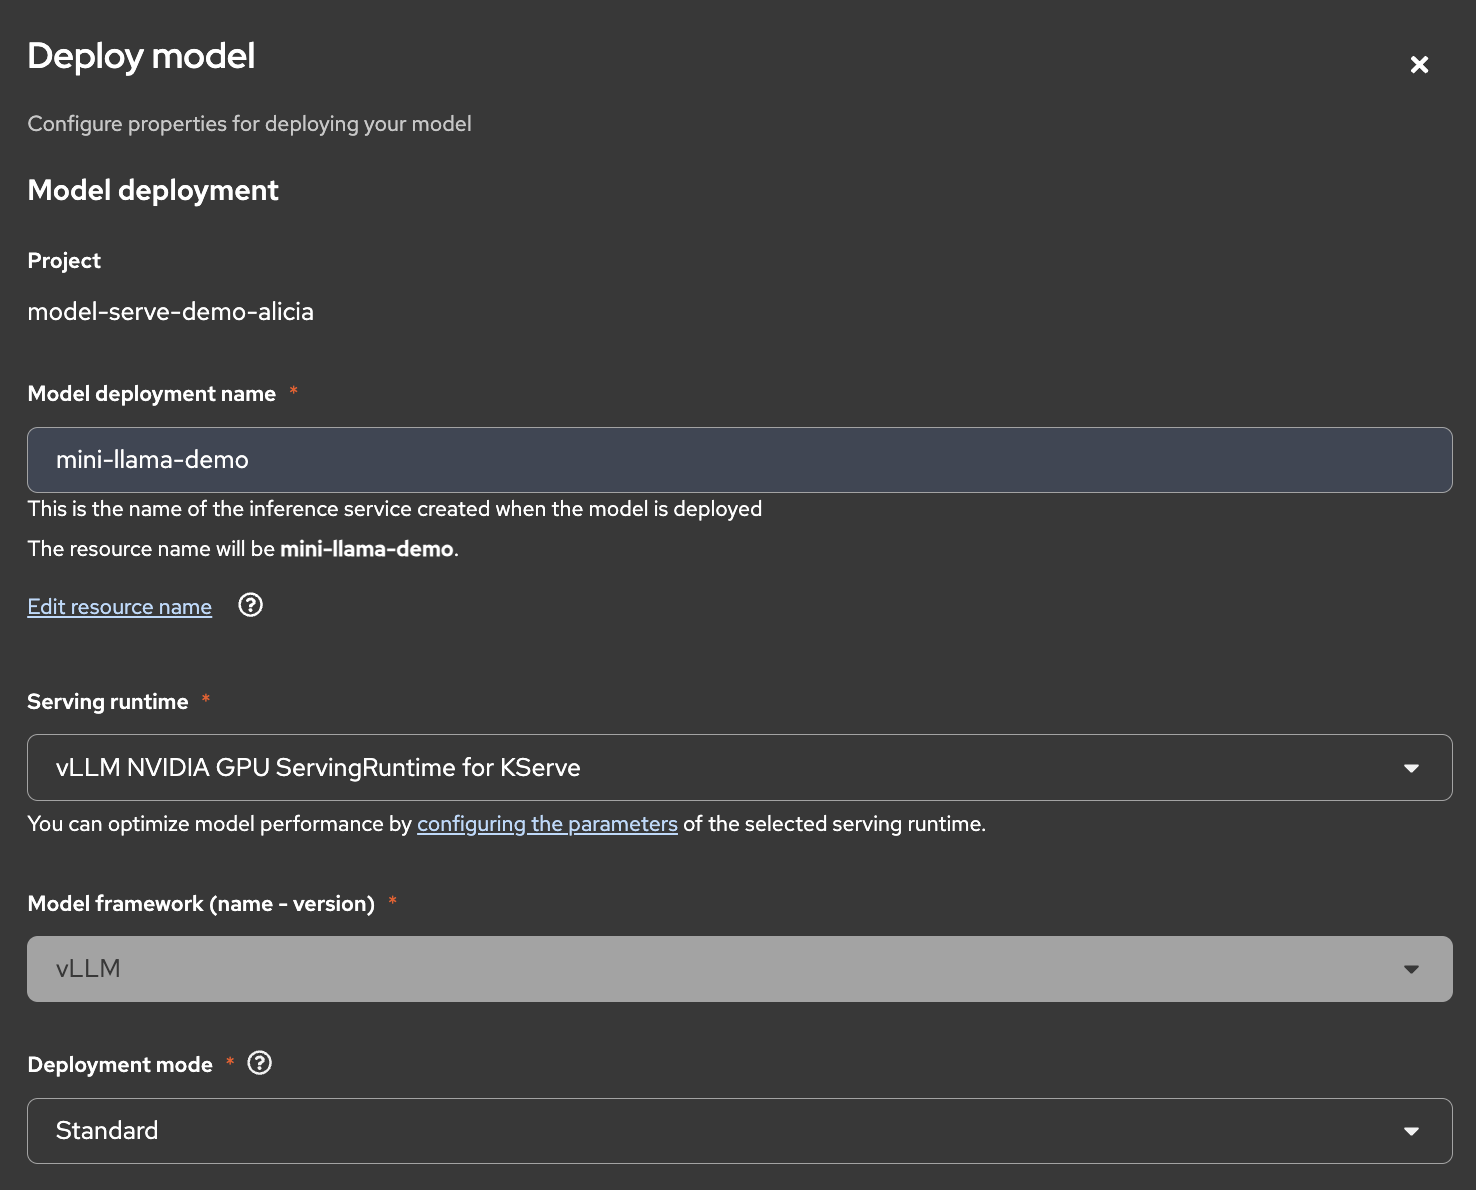
Now we can deploy the Llama model! Navigate to your specific project that you want to deploy your model in. You can either click the Deploy model button in the overview section or go into the Models tab at the top of your project dashboard. After you click Deploy model, you should see something like Figure 6.
Figure 6: Configuring and deploying the model.
The deployment form contains several configuration sections, shown in Figures 6 and 7. Fill out the initial fields as follows:
Access models tab: Click Deploy model to begin configuration.
Name your deployment: Choose a descriptive name for easy identification.
Select serving runtime: Choose VLLM NVIDIA GPU ServingRuntime for KServe.
Deployment mode: Select Standard for automatic route and ingress setup.
Server size: Choose appropriate resources. Here, we selected Medium.
Accelerator: Specify the GPU you provisioned earlier.
Model route and token authentication: Check both boxes to enable external route access and require token authentication.
Connection: Select the established connection that we just created.
Click Deploy.
Figure 7: Configuring and deploying the model.
Testing your deployment
Before diving into external access, let’s first confirm functionality through internal testing.
Internal testing
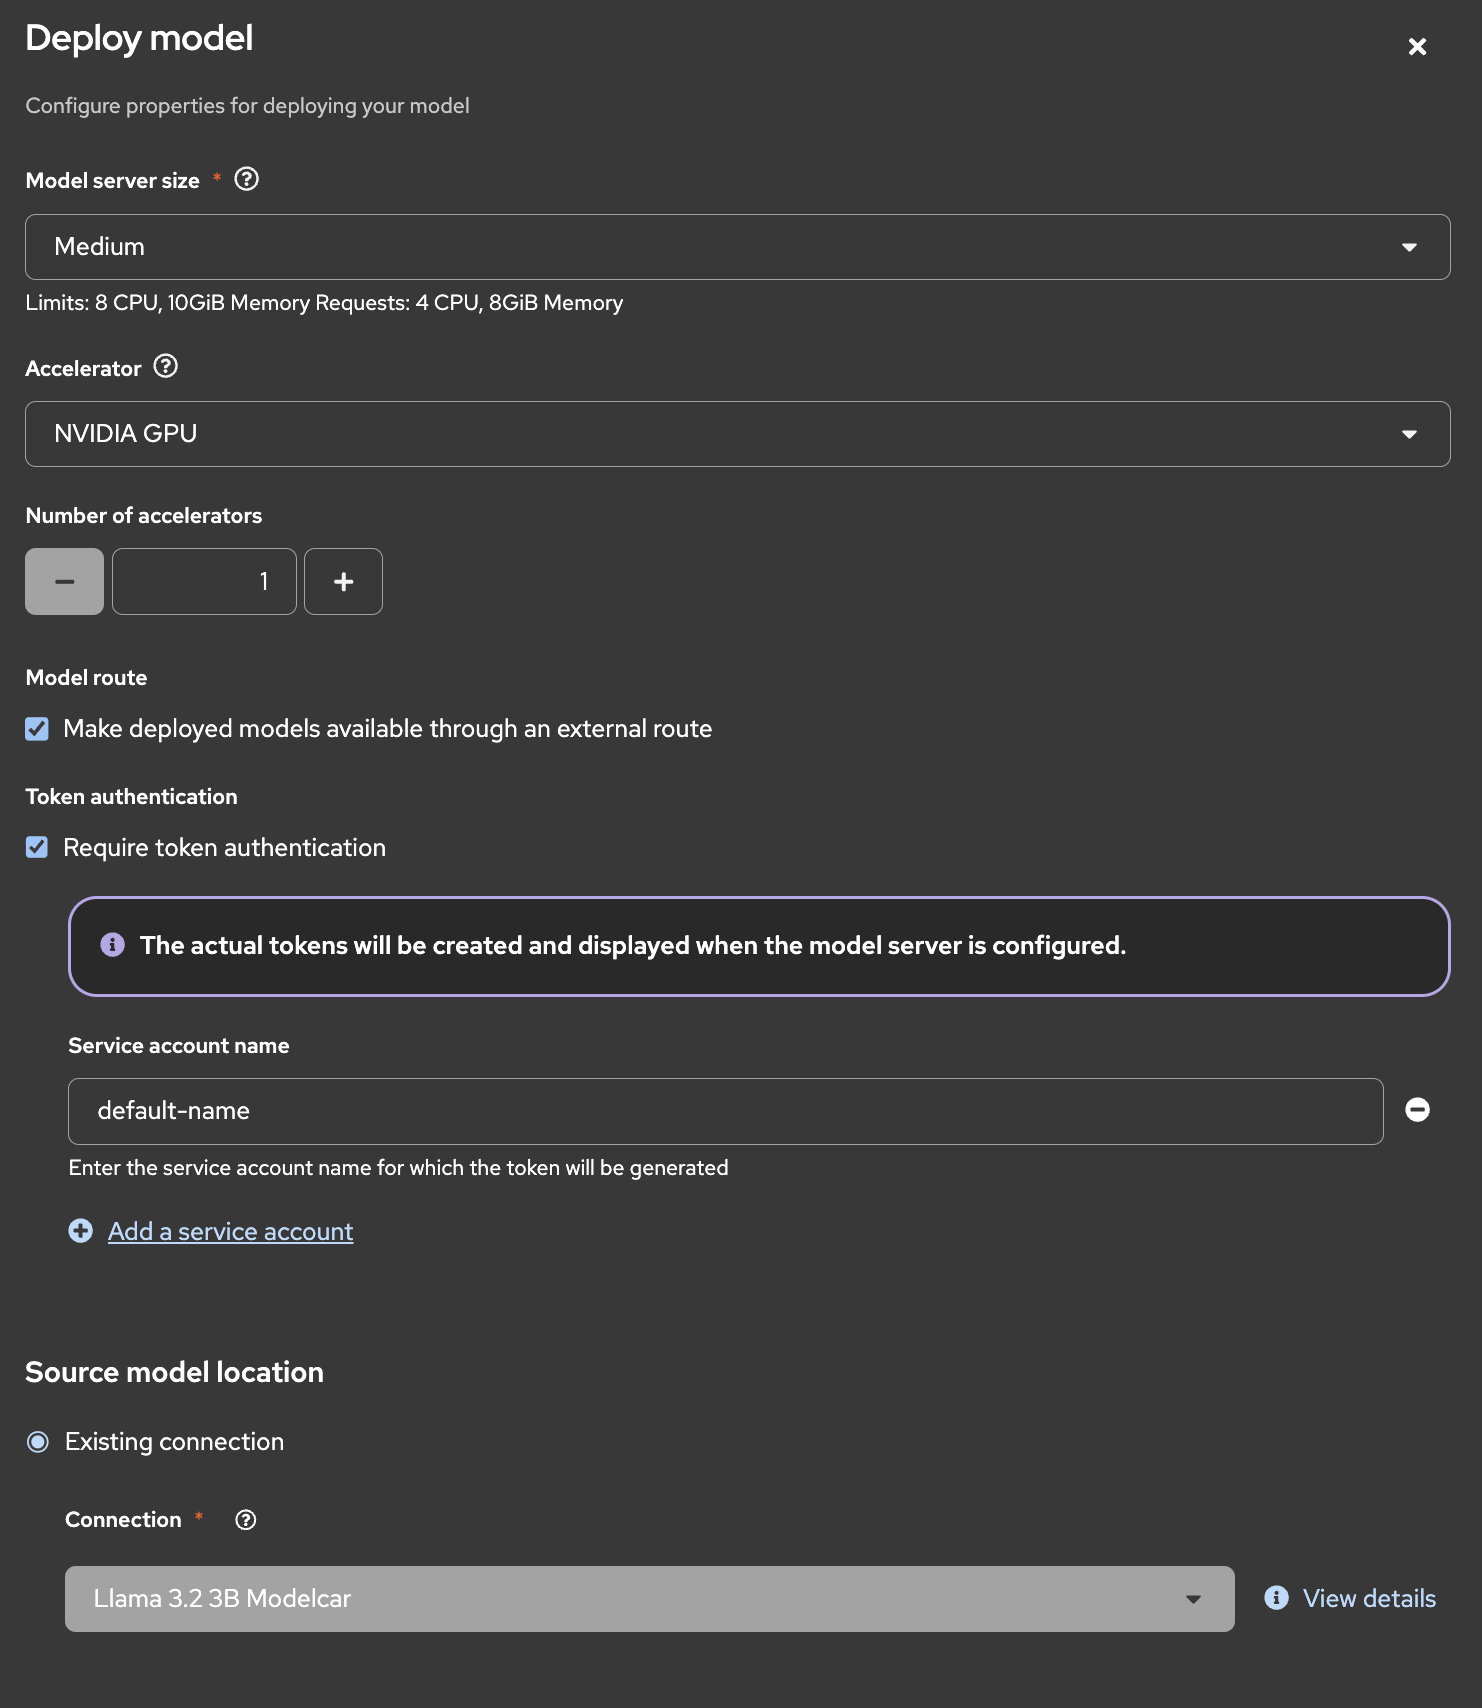
Once deployed, verify functionality directly within the OpenShift console. Navigate to Pods, as shown in Figure 8.
Figure 8: Locating your Llama model server in the Pods tab.
Select your project by using the other drop-down menu outlined in red and locate your currently running Llama model server:
Navigate to Workloads > Pods on the left side tabs.
Locate your running Llama model server. You should see it when you filter by your project when clicking the top drop-down menu, as shown in Figure 8.
Access the pod terminal.
Execute a curl command to test internal communication.
The vLLM runtime uses OpenAI’s API format, making integration straightforward. Learn more in the OpenAI documentation. The following is an example command that we used to test within the demo:
curl -X POST http://localhost:8080/v1/chat/completions \
  -H "Content-Type: application/json" \
  -d '{
    "messages": [
      {"role": "system", "content": "You are a helpful assistant"},
      {"role": "user", "content": "Hello"},
      {"role": "assistant", "content": "Hello! How can I help you?"},
      {"role": "user", "content": "What is 2 plus 2?"}
    ]
  }'
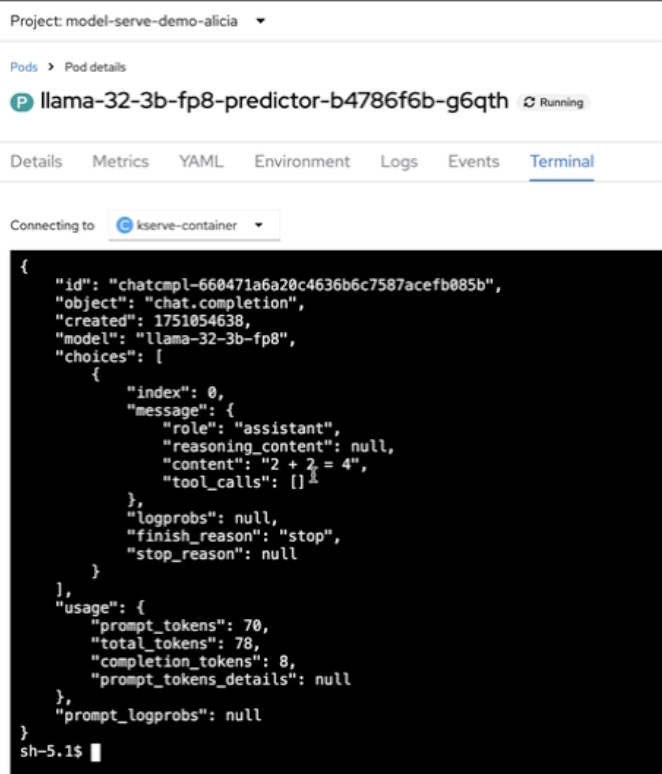
If your command output is successful, it should output something like Figure 9.
Figure 9: Successful curl request output in the pod terminal.
Testing external access
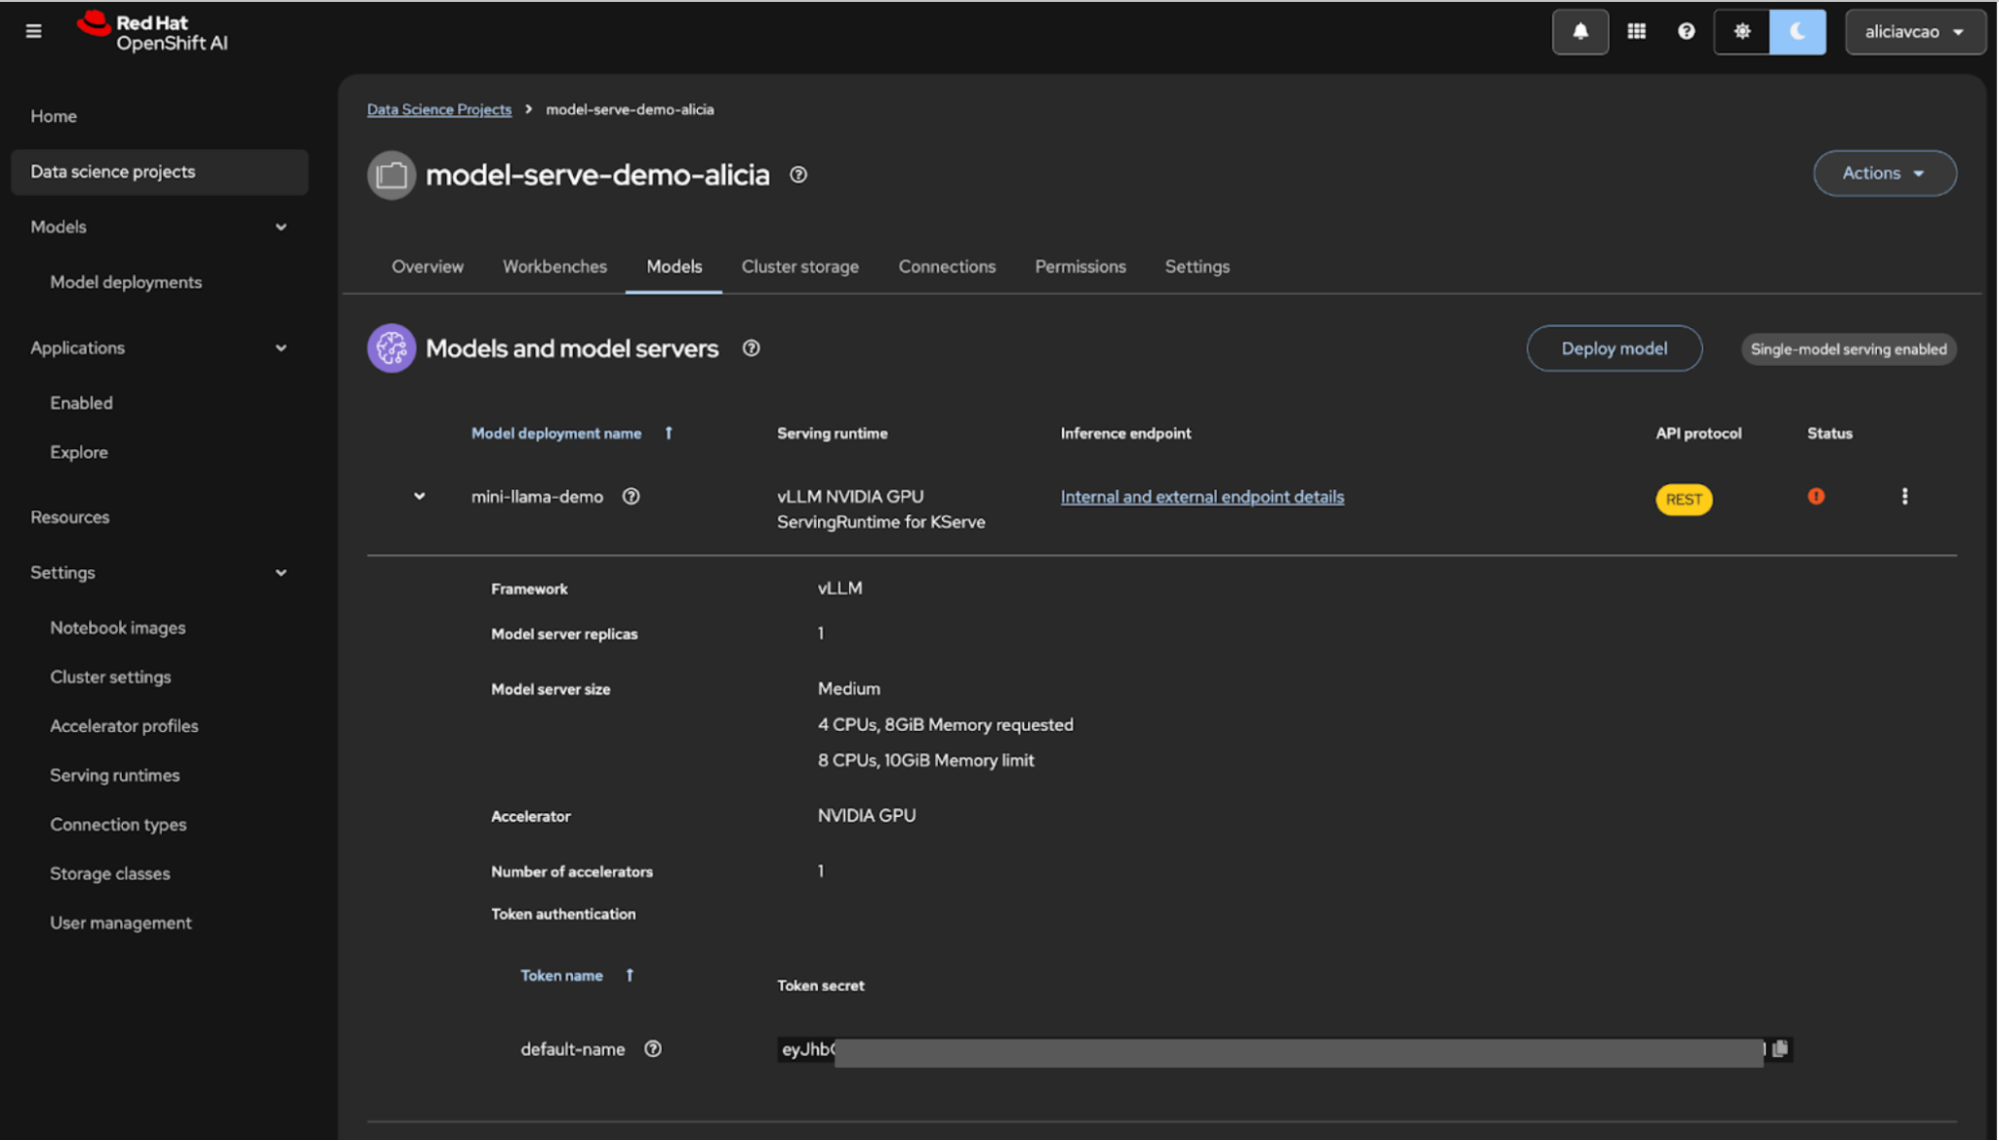
For external testing, use the token and external endpoint in your curl command. Going back to your model deployments within your project view in OpenShift AI, you can get this by selecting the drop-down button (Figure 10) and then the internal and external endpoint details for each of those respectively:
Copy the authentication token from the deployment dashboard.
Create an environment variable with your token within a terminal outside of the pod.
Modify your curl command to use the external endpoint with proper authentication headers.
Figure 10: Accessing external endpoint details from the Models tab.
Web interface integration
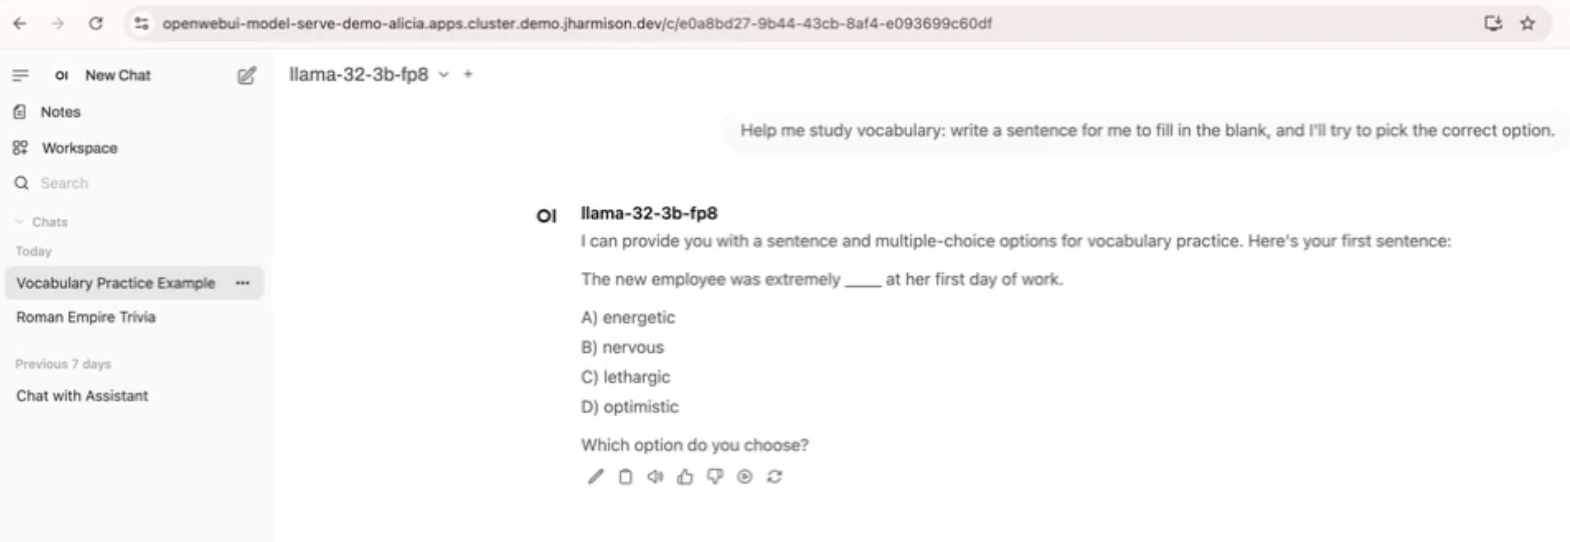
For a more user-friendly experience, integrate with OpenWebUI as follows:
Create a YAML configuration file with your external endpoint and token.
Use Helm to install Open WebUI in your OpenShift environment.
Access the clean web interface instead of manual curl commands. See Figure 11.
Figure 11: An example user interaction in the Open WebUI chat interface.
Key benefits and takeaways
Red Hat OpenShift AI simplifies the entire process of deploying and managing language models by providing:
Integrated infrastructure: GPU provisioning and management handled with OpenShift.
Flexible connectivity: Multiple options for accessing model images and data sources.
Security built-in: Token-based authentication and network isolation.
Scalable architecture: Easy adjustment of resources based on demand.
This demo showcases just one of the many features available in OpenShift AI. The platform’s comprehensive approach to the data science lifecycle makes it a beneficial tool for organizations looking to deploy AI solutions at scale while maintaining security and operational efficiency.