KraftShade 1: Unleashing GPU Power on Android — A First Look

Welcome to the first installment of our blog series! In this blog series, we will introduce KraftShade, a modern, high-performance OpenGL ES graphics rendering library for Android, meticulously designed to offer a type-safe, Kotlin-first abstraction over OpenGL ES 2.0 with coroutines support!
Why Kraftshade?
For most developers, when we want to build a feature which applies image filter effects, we don’t have enough computer graphics knowledge to write shader programs, so the option you might consider is to search for an existing library on the Github, where you will find the most well-known OpenGL library for Android — GPUImage.
GPUImage is indeed a very powerful library, but it has the following limitations:
- No active maintenance since 2021
- Java-centric design
- Can not apply built-in shader effects on Video
- No Jetpack Compose support
- Can only apply shader effects sequentially.
Most of above limitations weren’t a big problem for our product (PicCollage), but since our effects are getting more complex over time, sequential shader effect processing has become a big limitation for us, we need to do many hacky workarounds to generate a complex effect. So, we decided to create our own GPU library that fits our need to handle complex shader pipeline.
Here’s kraftshade’s key highlights:
- Type-safe, Kotlin-first abstraction over OpenGL ES 2.0.
- Rich DSL for building flexible shader pipeline.
- Full Jetpack Compose support.
- Easy to build animated effect with Input system.
- On/off screen rendering to apply effects in various of use cases
What kraftshade can do
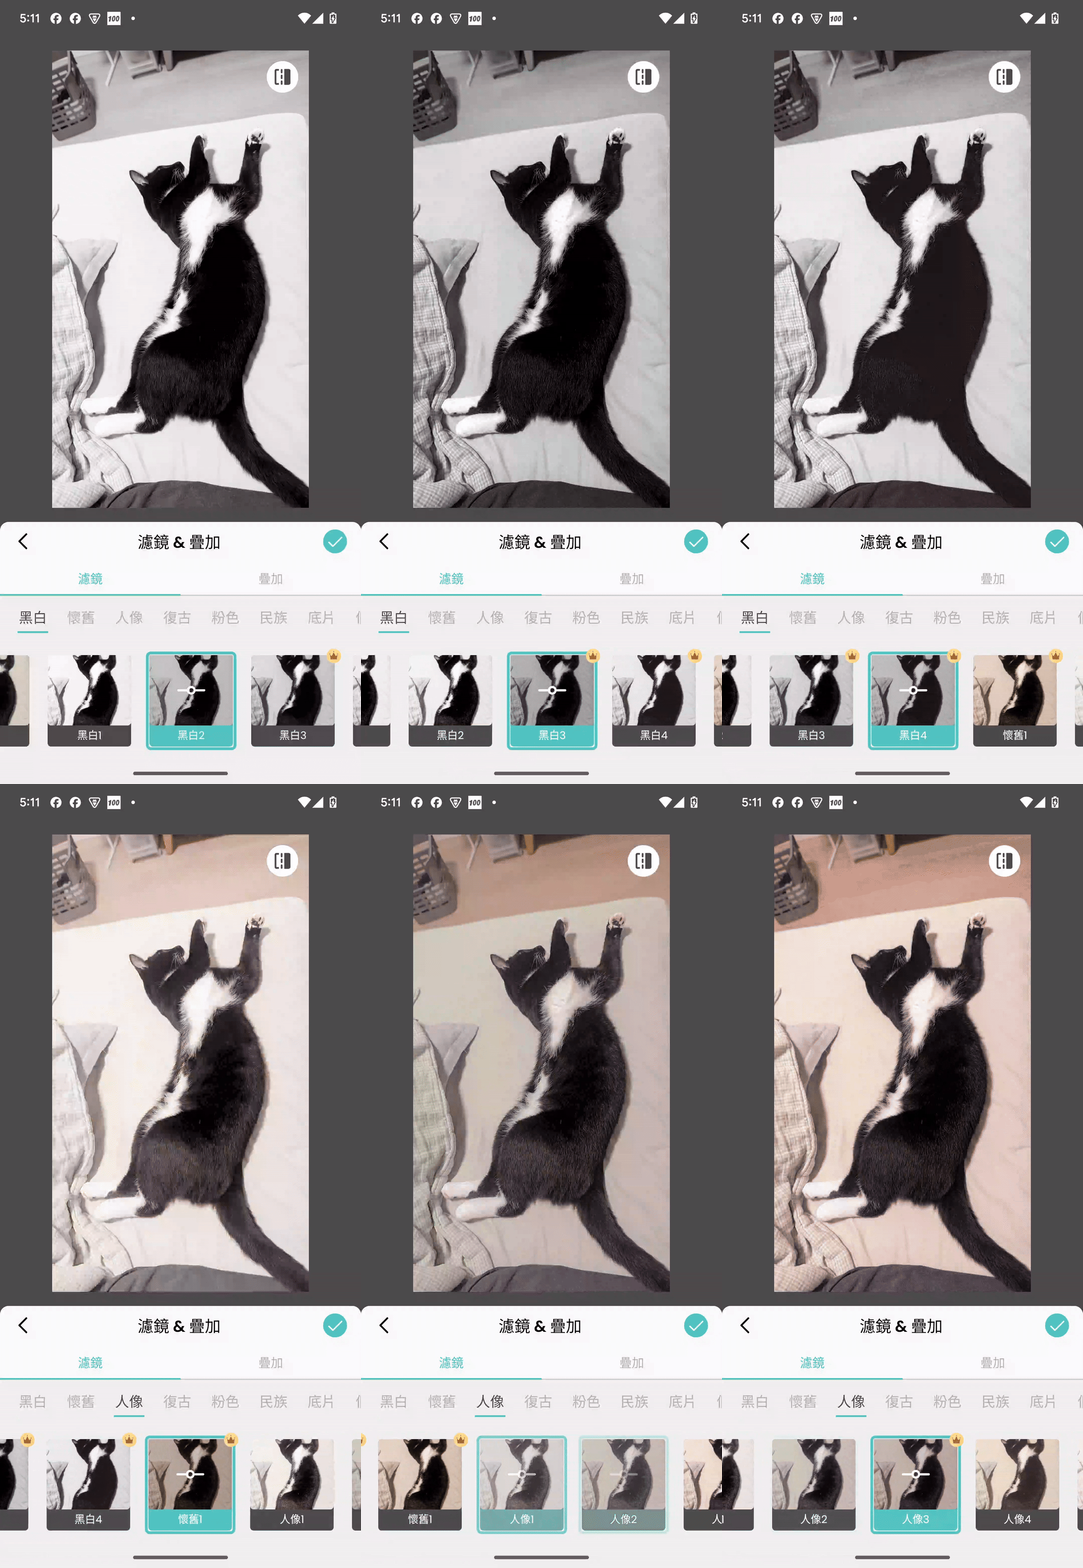
Following videos and image demonstrate that what kraftshade capable of: you can create a firework animation overlay, filters and slideshow transition effects.


The following part will guide you step by step to use our basic view component — KraftShadEffectView that applies saturation effect and brightness to an image. And having basic knowledge about Jetpack Compose is required.
1. Project setup
Before you begin, make sure you have an Android project set up with Kotlin.
2. Adding Dependencies
Gradle (build.gradle.kts)
dependencies {
    // Core library
    implementation("com.cardinalblue:kraftshade:latest_version")

    // Optional: Jetpack Compose integration
    implementation("com.cardinalblue:kraftshade-compose:latest_version")
}
Replace latest_version with the current version of KraftShade. You can find the latest version by checking the badges at the top of the GitHub repository or by visiting the Maven Central repository.
Version Catalog (libs.versions.toml)
If you’re using Gradle’s version catalog feature, add the following to your libs.versions.toml file:
[versions]
kraftshade = "latest_version"

[libraries]
kraftshade-core = { group = "com.cardinalblue", name = "kraftshade", version.ref = "kraftshade" }
kraftshade-compose = { group = "com.cardinalblue", name = "kraftshade-compose", version.ref = "kraftshade" }
Then in your module’s build.gradle.kts file:
dependencies {
    implementation(libs.kraftshade.core)
    // Optional: Jetpack Compose integration
    implementation(libs.kraftshade.compose)
}
Troubleshooting: If you encounter a build failure “source must not be null”, you might using older kotlin version, please check the language version dependency here: https://mvnrepository.com/artifact/com.cardinalblue/kraftshade
3. Prepare Your Resource
Add a sample image to your project’s resources. For example, place an image in your res/drawable folder.
4. Get Ready to Compose Effect
There are two key components you will use in this sample:
KraftShadeEffectView
A Jetpack Compose wrapper for KraftEffectTextureView (Traditional Android View), providing shader effect capabilities in Compose UIs
@Composable
fun KraftShadeEffectView(
    modifier: Modifier = Modifier,
    state: KraftShadeEffectState = rememberKraftShadeEffectState()
)
Parameters:
- modifier: Standard Compose modifier for customizing the view’s layout
- state: A KraftShadeEffectState that manages the view’s state and operations
KraftShadeEffectState
Manages the state of the KraftShadeEffectView and provides methods to interact with it.
class KraftShadeEffectState(
    scope: CoroutineScope,
    var skipRender: Boolean = false
)
Key methods:
- setEffect(…): Sets the effect to be applied
- requestRender(): Triggers a render with the current effect
When calling setEffect(…) , by default it will calls requestRender() after everything is being completely setup, this will helps you when you want to see the result immediately without calling requestRender() manually. It is also possible not to render it immediately if you have special use cases, it can be done by override the default afterSet implementation:
fun setEffect(
        afterSet: suspend GlEnvDslScope.(windowSurface: WindowSurfaceBuffer) -> Unit = { requestRender() },
        effectExecutionProvider: EffectExecutionProvider,
    ) {
setEffect() and pipeline
Calling setEffect will allow you to modify the KraftShadeEffectState then triggers the recomposition. It has two parameters, the second parameter effectExecutionProvider provides the core magic of our library, we will use Pipeline DSL here to construct the shader pipeline that produce the magical result.
The Pipeline DSL is a powerful feature of KraftShade that allows you to create complex shader pipelines with minimal boilerplate code, and now we will use a very simple example to show how that work, for more complex example will be introduced in later posts.
pipeline(targetBuffer) {
    serialSteps(
        // set up the input texture from the loaded bitmap
        inputTexture = sampledBitmapTextureProvider { image },
        // provide the target buffer where the final output will be rendered
        targetBuffer = targetBuffer,
    ) {
        step(SaturationKraftShader(saturation = 0.5f))
        step(BrightnessKraftShader(brightness = 0.2f))
    }
}
In this example, we use serialSteps , which is a linear sequence of shader operations where the output of each step becomes the input for the next step, so the order of the pipeline here would be:
1. image as inputTexture , which will apply SaturationKraftShader to generate a temporary result A on a texture buffer.
2. Get texture buffer from result A and apply BrightnessKraftShader , the result will be put into targetBuffer that gives to View to render.
The following code shows put all the codes together:
@Composable
fun KraftShaderSample(modifier: Modifier = Modifier) {
    val state = rememberKraftShadeEffectState()
    val context = LocalContext.current

    var aspectRatio by remember { mutableFloatStateOf(1f) }
    var image by remember { mutableStateOf<Bitmap?>(null) }

    // Load image and set aspect ratio
    LaunchedEffect(Unit) {
        val bitmap = BitmapFactory.decodeResource(context.resources, R.drawable.sample_image)
        image = bitmap
        aspectRatio = bitmap.width.toFloat() / bitmap.height.toFloat()
    }

    // Set effect
    LaunchedEffect(Unit) {
        state.setEffect { targetBuffer ->
            // Pipeline DSL, will apply the shader to the targetBuffer
            pipeline(targetBuffer) {
                // serialSteps is a linear sequence of shader operations where
                // the output of each step becomes the input for the next step
                serialSteps(
                    // set up the input texture from the loaded bitmap
                    inputTexture = sampledBitmapTextureProvider { image },
                    // provide the target buffer where the final output will be rendered
                    targetBuffer = targetBuffer,
                ) {
                    step(SaturationKraftShader(saturation = 0.5f))
                    step(BrightnessKraftShader(brightness = 0.2f))
                }
            }
        }
    }

    Box(
        modifier = modifier
            .fillMaxSize(),
        contentAlignment = Alignment.Center,
    ) {
        KraftShadeEffectView(
            modifier = Modifier.aspectRatio(aspectRatio),
            state = state
        )
    }
}
here’s the result you will see on the screen :
Input image

Result on the screen

Try It Yourself
Now that you’ve seen how simple it is to get started with KraftShade, why not experiment with different values? Try adjusting the saturation and brightness parameters, or explore other built-in shaders like ContrastKraftShader or HueKraftShader. The beauty of the Pipeline DSL is that you can easily add, remove, or reorder effects to create unique combinations.
Want to make it interactive? Add sliders to control the shader parameters in real-time! Here’s what it could look like:

Just add a simple Slider composable and update your shader values – you’ll get smooth 60fps GPU-accelerated effects that respond instantly to user input. Perfect for photo editing apps or creative tools!
Resources & Next Steps
Get KraftShade
- GitHub Repository: Explore the source code, contribute, or report issues
https://github.com/cardinalblue/android-kraft-shade - Documentation: Comprehensive guides, API references, and advanced examples
https://cardinalblue.github.io/android-kraft-shade/docs/intro
What’s Coming Next
This introduction barely scratches the surface of what KraftShade can accomplish. In our upcoming posts, we’ll dive deeper into shaders, explore KraftShade’s robust shader system, and show you how to handle uniforms and textures with ease.
Ready to transform your Android app’s visual capabilities? Start with the simple example above, and join us on this journey into high-performance Android graphics!
KraftShade 1: Unleashing GPU Power on Android — A First Look was originally published in PicCollage Tech Blog on Medium, where people are continuing the conversation by highlighting and responding to this story.


